Pages

April 30, 2012

Fun Twist on Book Reports!


Five Looks on a Book is a simple and fun activity that offers a nice twist on the traditional book report. Students name five adjectives that describe their book and then write one supporting detail for each adjective. You can download this freebie from my Reading Workshop page on Teaching Resources.


The original idea for the activity came from 3rd grader Adrienne Duarte, and I created the graphic organizer to go with her idea. When I first shared this activity online, Facebook fans helped me brainstorm adjectives to describe books. We came up with 99 different adjectives, and Stephanie Schifini compiled and alphabetized the list. Thanks, Adrienne and Stephanie!

If you use this activity with students, I would recommend having students brainstorm adjectives for books before showing them your list of 99 adjectives. In fact, why not make it a challenge? Tell them that you have a list of 99 adjectives and you want to see if they can come up with a list of 99 adjectives without looking at your list!  

Post a large sheet of paper on a bulletin board and allow students to add adjectives throughout the week. When they have found as many as possible, reveal your words and compare the two lists. After students complete their worksheets, arrange them on the bulletin board around the poster. Title the board, "Take A Look!" and you've just created an instant bulletin board display!

Five Looks on a Book is such a quick and easy activity that you could easily repeat it several times throughout the year, or even once a month. You can download this 3-page freebie from my Reading Workshop page on Teaching Resources. Give it a try, and let me know what you think!

April 29, 2012

Move to Learn in Science!

Brain research supports the need for students to get plenty of movement throughout the day - but that's something every teacher knows! In Teaching with the Brain in Mind, Eric Jensen states, "Brain-compatible learning means that educators should weave math, movement, geography, social skills, role play, science, and physical education together."

I completely agree, and that's why I enjoyed using simulations and role-playing games in my classroom. One day my students were stuck inside due to the winter weather, and I made up a game where the kids pretended to be molecules and they moved according to the changes in states of matter. We reviewed the three states of matter, and I used water in my examples:
  • Solids - Molecules are tightly packed and move slowly, staying in a rigid formation. (Ice would be an example of matter in a solid state.)
  • Liquids - As solid matter is heated, the addition of energy causes molecules to move more quickly and spread apart. (Water is a liquid.)
  • Gases - With the addition of more heat, the molecules move even faster and pread even farther apart. (Steam is the gaseous form of water.)
Here's a simple visual I found online:

States of Matter Game
To start the game, I asked everyone to stand up, find a spot on the floor, and then move as I guided them through the states of matter. One of the rules was that they couldn't touch anyone or anything as they moved, so I had them cross their arms across their chests to keep their bodies in a compact form.
  1. Solids - They started out bunched together in one part of the room, barely moving as they role-played molecules in the solid state. 
  2. Liquids - Then I told them they were getting warmer and they needed to increase their speed and spread out accordingly. 
  3. Gases -Finally, they became gas molecules and moved quickly but carefully all over the room. 
Anyone who touched something or someone had to sit out for a minute (mostly to calm down!). Click the image to download the directions.

Water Cycle Adaptation
The States of Matter game is easily adapted to have students role-play the water cycle. Tell them they are now molecules inside a water droplet.Then guide them through the processes of evaporation, condensation, and freezing. When they start evaporating, they become a gas so they need to spread out. As they cool down and condense to form clouds, they become liquid and move closer together. At that point you can have them become a liquid again as rain or tell them they are freezing to form snowflakes or solid particles of ice. Relate their movements to water's different states of matter during the water cycle.

More Water Cycle Resources

If  your students need extra practice with identifying examples of condensation, evaporation, and precipitation, check out my Water Cycle Combo on TpT. This product includes includes 32 task cards, a sorting activity, and a quiz.  Your kids will master these concepts in no time!


Move to Learn Link Up
Because I think movement is so important in learning, I was excited when Rachel Lynette posted her Move to Learn link up. I decided to write this blog post to share one of my favorite ways to get kids moving. Even if you aren't studying states of matter, the game works great as a 5-minute energizer. With younger kids, you can leave out the science terminology and just tell them to speed up and slow down according to your directions. My students always loved this one! Please visit Rachel's original blog post on this topic for more ideas about how to get kids up and moving to learn!


April 26, 2012

Pay It Forward and Make Someone's Day!


Did you know that Pay It Forward Day is celebrated in April each year? This year it's on April 28th, and I decided to put together a little freebie in honor of this special day! You can download the printable from my Seasonal Page on Teaching Resources during the month of April.

The student activity page explains the meaning of "pay it forward" and asks them to do at least six good deeds on Pay It Forward Day. Each good deed is recorded in one of the clouds. Ask students to bring their completed papers back the next day to share their experiences.

To learn more about International Pay It Forward Day, you can visit the Pay It Forward Foundation website. Read their How It Works page for specific activity ideas for your classroom. The site offers downloadable cards that you can print out and give to students to pass on when they do a good deed.

By the way, I intentionally left the date off this activity page. As far as I'm concerned, any day can be Pay It Forward Day! You can download this page by clicking on the image or by visiting my Seasonal Page on Teaching Resources during the month of April. If you can't find the freebie on that page, sign up for my newsletter and follow the links to the private page for subscribers called Laura's Best Freebies.

I hope you enjoy this freebie. If you use the activity page with your students, please leave me a message to tell me how it went!


April 24, 2012

Order of Operations Bingo and a Freebie

Looking for my Order of Operations freebie? I've deactivated the original post that included this freebie, but these two pages are still free in a more recent post. Click over to Teaching Order of Operations: No-Fail Strategies That Work to find a step-by-step order of operations lesson and these free printables!


April 18, 2012

Crazy Class Auctions and a Freebie!

April is Financial Literacy Month, so it's a perfect time to introduce a classroom economy system. This program makes a great reward system and teaches students how to manage money. Several years ago I created this free Classroom Economy Pack, and I recently updated it with a new cover and new images to give it a fresh look.

You may have also seen it on Pinterest as the "Classroom Money Pack," a version I created because you don't have to use the materials to set up a complete classroom economy system. You can use the money patterns and bank transaction record any way you like. Download this freebie from my TeachersPayTeachers store.

Class Auctions
One of my favorite parts of my own Classroom Economy program was my Class Auction. I paid students for their class jobs with classroom money, and at the end of each quarter, the students brought in items from home to auction off. Here you can see them gathered around our carpet area where we would spread out all of the items to auction off. At first I was the auctioneer, but then my students would take turns in that role. Those auctions were crazy and fun, and everyone walked away with a little something!


In the Classroom Economy Pack freebie, I included this idea and many more for setting up your own program. What are some of your favorite strategies to use with classroom money and for teaching financial literacy?

You can download the Classroom Economy Pack from my TeachersPayTeachers store. Please leave a comment to tell me how you use classroom money with your students!

April 17, 2012

Just a Dream to Save Our Planet

Just a Dream to Save Our Planet
A few weeks ago I posted a question on Facebook asking teachers to tell me their favorite book to read aloud for Earth Day. Just a Dream by Chris Van Allsburg was the top recommendation, but I had not read it before. I always like his books, so I immediately ordered it from Amazon.com. It's a beautiful picture book about a boy named Walter who imagines an exciting future on Earth - until he has a dream with a series of episodes that take him on an unforgettable adventure. Walter sees what will happen to the Earth if we don't take better care of our planet.

What a great introduction to environmental issues and problems! Thanks to everyone who recommended it. It was written in 1990 so I'm not quite sure how I missed this treasure!

I had so much fun creating a set of activities based on the theme of this book!  Just a Dream to Save Our Planet starts with a quick Think-Pair-Share for students to discuss their visions of the future and is followed by a read-aloud session. After that, you can choose from several cooperative learning and writing activities.


You can download this free packet to go with Just a Dream from my TeachersPayTeachers store. Everything is explained in the teacher directions, but here's a quick list of what you'll find:
  • 8 prepared discussion cards
  • 4 blank discussion cards
  • 9 cards describing the events
  • A graphic organizer for sorting the event cards into categories
  • Problem-Solution graphic organizers for the environmental issues   
Why am I giving this 15-page packet away for free? I guess because I think it's so important for all kids to explore environmental issues and discuss ways to protect our Earth. So it's my gift to you, and I hope you will make this lesson your gift to your students!

April 13, 2012

Green Companies? Let the Jury Decide!

Critical Thinking, Researching, and Writing Freebie

Have you noticed how often companies imply that their products or services are “green,” or environmentally friendly? But are they really “going green”? Or are they are just trying to look good and give the impression that their company is helping the Earth?

I started thinking about this when I was looking at label on a jar of peanuts. In bold letters at the top it said “85% Less Packaging” which sounds like a good thing.

But then underneath it in small letters it said “Than glass jar by weight.” So is this good for the environment?

Glass jars which are 100% recyclable have been replaced with plastic jars that are the same size but weigh less. Plastic is bad for the environment; it’s not fully recyclable like glass, and it takes hundreds of years to degrade in a landfill.

So why would a company switch to plastic if it’s not good for the environment? Could it be that plastic is cheaper? Could it be that reducing the product’s weight makes it cheaper for them to ship those jars? I know I'm making inferences, but it sounds to me like they have switched to plastic to save themselves money. Yet they are promoting the switch as being good for the environment! Boo on them!

This situation made me realize that we as teachers have a unique opportunity to encourage critical thinking about environmental issues. We can ask our students to look at these types of claims and evaluate them for themselves.

Take It to Green Court!
Did you ever see the animated kids’ show called Science Court? Someone would sue a company, and the case would end up in Science Court.  The scientific basis for the claim was examined, the jury discussed the evidence, and a verdict was reached. Why not do something similar to examine environmental claims and call it “Green Court”? As soon as the inspiration hit, I knew I had to create a packet of teaching materials to put this idea into action!

Since I no longer have a classroom where I can test out my crazy schemes, Mandy Neal, tested it with her students, and she shared their experiences on her blog, Teaching with Simplicity. As I had hoped, it turned out to be an engaging lesson that activated critical thinking, researching, writing, and discussion skills. Her kids had fun, but they were learning to be critical thinkers, and more importantly, they were also discussing some serious pretty serious real life issues.


Green Court Claims Freebie
After getting feedback from Mandy, I organized all of the lesson resources in one downloadable PDF file and added the CCSS alignment information to the end of the packet. I originally created this freebie for Earth Day, but it's a terrific lesson any day of the year. You can use it when studying propaganda in advertising, as a social studies lesson about the court system, an environmental science lesson, or a research and writing activity. The lessons are aligned with Common Core Informational Text Standards for grades 4, 5, and 6, as well as the Speaking and Listening Standards for all grades.

You'll find the Green Court Claims freebie on my Science page in the Teaching Resources file cabinet. You can also find it on my Laura's Best Freebies page when you sign up for Candler's Classroom Connections. I hope you and your students enjoy this lesson!


April 10, 2012

Save Time and Paper with Mini ABC Books!

Free Mini ABC Booklets - perfect for so many different types of projects!
Have you ever had your students do an ABC booklet as a project? One way to do this is to ask students to use full sheets of paper and create a separate page for each letter of the alphabet. On each page they include a word, a bit of text, and an illustration related to their topic.

The problem is that it takes forever to complete and it requires over 20 sheets of paper per student! My Mini ABC Book solves both of these problems, and it's free, too! The booklet consists of 4 printable pages that are duplicated front to back on 2 sheets of paper. Fold the pages and staple them in the middle to create a small booklet.

Students complete the pages by writing a sentence for each letter and drawing one illustration per page. Since each half page has 4 alphabet letters but only one place to draw a picture, it takes about 1/4 of the time to complete as a regular ABC booklet.

The booklet shown above can be used for almost any ABC project. Assign topics, or let students choose their own. Make sure the topic is broad enough that your students will be able to think of a keyword or phrase for each letter of the alphabet. In science, you might use this during a study of the the solar system. In social studies, it would work for community helpers or a historical time period. In health, it would work great for a nutrition unit.

Cooperative Learning ABC Projects
How about turning this into a team or partner project? Ask team members to brainstorm ideas together for each letter of the alphabet and then divide up the pages to do the work. However, you won't be able to print the pages front to back; instead, glue them together after students finish their individual pages.


Free Mini ABC Booklets - perfect for so many different types of projects!
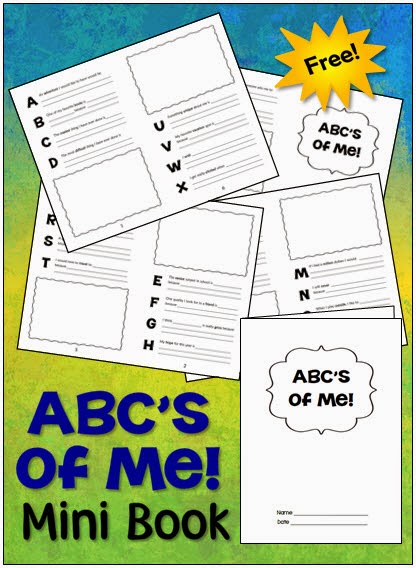
ABC's of Me Booklet
A fun variation of this project is the ABC's of Me booklet. It's a great way for students to get to know each other at the beginning of the year, and it makes a nice end-of-year project, too. Each letter of the alphabet has a sentence starter to help students think of something to wrote. For example, the sentence starter for A is "An adventure I would like to have is ...."

Thanks to Francie Kugelman for the ABC's of Me concept. I designed the booklet, and several teachers on Facebook contributed ideas for sentence starters for each letter of the alphabet, so this was definitely a collaborative effort!

Where to Download These Freebies
Both of these ABC Mini Books can be found on Laura's Best Freebies, a private page on my website that can be accessed by subscribers to my newsletter, Candler's Classroom Connections. If you're a current subscriber, check your recent emails from me to find a link. If you aren't a subscriber, you can sign up for free on Teaching Resources here.

ABC Project Topics Needed
How might you use the ABC Mini Book? Do any topics come to mind? Please share your ideas in a comment below.


April 9, 2012

Field Trips - Follow Up on the Fun!

Field trips can be so much fun for kids, and they provide unique opportunities for children to discover new places and experience real world learning.

But have you ever felt that your students had so much fun that they missed out on the learning? It's discouraging when you try to discuss the trip later and your students can't answer the simplest questions about their experiences. I don't believe in loading kids down with assignments when they are on field trips, but I do think they should be expected to learn something new that day.

Field Trip Follow-up Freebie
My solution to this problem was to create a Field Trip  Follow Up Report to help my students reflect on what they learned on our adventures. Here's how I used the report:
  1. Before the trip, I showed it to them and told them to be on the lookout for new ideas and information that they could write on this report later. I did not ask them to fill it out out during the trip because I knew they wouldn't have time. 
  2. The next day, I gave them each a copy of the form. We spent a few minutes discussing the trip and letting students share with the class what they enjoyed and what they learned. 
  3. Finally, I provided some quiet independent work time to give everyone the opportunity to draw a memorable scene from the trip and write about all that they had learned. If they were not able to finish during class, I allowed them to finish it for homework.   
I have to admit that after the excitement of the trip, I really enjoyed that bit of quiet reflection time! The completed reports make a great bulletin board, too. You could easily turn this into a digital project by asking students to create a storyboard in PowerPoint or using a suitable app.

I created two variations of the Field Trip Follow-up Report, so choose the one that's best for your students. The main differences are the clip art and the amount of space between the lines. Both forms are available in color and black and white. Click the link to download this freebie from my TpT store.

If you're interested in learning how to tie-dye t-shirts for field trips, read Boost Class Spirit with Tie-Dyed T-Shirts. Your students will love this project, and it will make for a really memorable and easy field trip!

What are some of your tips for a successful field trip? Please share!


April 8, 2012

Boost Class Spirit with Tie-Dyed T-shirts!

Spring is here, and that means field days and field trips! As the weather turns sunny and warm, kids and teachers both want to get out of the classroom. But sometimes after everyone is outside, it's difficult to keep track of your students! That's why I started doing this easy tie-dye t-shirt project early in the spring. As you can see from this photo of my former class on a class trip to the zoo, when everyone is wearing the same color shirt, it's easy to locate them no matter where they are. It's also really helpful for your parent volunteers because they know exactly who's in your class. Therefore, they feel more comfortable speaking to any of your students who are acting a bit rambunctious. 

For years I had thought of doing a tie-dye project with my class, but the whole thing always seemed so messy. I remember walking by classrooms where kids were tying shirts and squirting dye onto them, and the project seemed like way more than I wanted to tackle. 

But one year my entire grade level decided to tie-dye shirts, with each class choosing a different color. They explained that it's easy when you have the kids tie up their shirts at school and you take them home to dye in your washer. Yes, I know! I thought the same thing! Whoa! I'm not putting purple dye into MY washing machine! However, they convinced me to give it a try saying that all it takes to clean the washer later is running a wash cycle with bleach and hot water. I followed their directions and it really was easy! My students loved tying their shirts and creating their own unique designs, and it was terrific to have the shirts ready to go for field day and for our spring field trip.


How to Download the Free Directions
Because I love this project so much and want others to try it, I've written detailed directions explaining exactly what to do. I also included sample parent letters requesting the t-shirts and money for the dye. You can download Tie-Dye T-shirts Made Easy from my Teaching Resources website on the Odds N Ends page.   

Making tie-dyed t-shirts was a great activity for boosting class spirit, and it proved to be an excellent classroom management tool as well - or maybe I should say, an excellent outdoor management tool! I hope your students enjoy the project as much as mine did!

April 7, 2012

Try This When Kids Are Absent!

Doesn't it drive you crazy when kids are absent for several days and you have to gather up a list of assignments they need to complete? Even though I know it's usually not their fault for being absent, it's one more management task to add to my already full load. Let's not even mention the times I've had to do this for students whose families take trips to Disney World in the middle of the school year!

I developed this assignment make up form to make my job a little easier when kids are absent. You can download it from the
Classroom Management page on Teaching Resources. Here's how I used it:


  1. Each day that a student was absent, I placed this form on his or her desk. 
  2. I assigned a student in the same team to write down any classwork or homework assignments on the chart at the bottom. 
  3. If I handed out a graphic organizer or worksheet to complete, I asked the student helper to paperclip it to the back of this form and write the title of the assignment on the front. 
  4. When the absent student returned, he or she was given the packet of make-up work which included due dates. 
  5. As each assignment was turned in, I checked it off and initialed that it was completed. I kept the final form for my own records.
  6. If a student was particularly forgetful or irresponsible, I made a copy of this form before giving it to the child. In the event that the make-up work was not turned in on time, this form was my proof to the parent that I did provide the child with a list of assignments to complete.
  7. If students were absent more than one day, I completed prepared a separate form for each day. In fact, I just kept a stack of these forms in my paper organizer because someone was absent almost every day. 
This system worked great for me because it was an easy way to make sure that I didn't accidentally overlook an assignment. It also helps to keep the student organized and parents love it. If a student does not complete the make-up work, they can't claim that I never told them about it because the proof is right on the form! 

What is your favorite system for making sure students complete work after they are absent?


April 5, 2012

Stop the Clock - An Adventure in Teaching Time!

SmartBoards + Dry Erase Boards = Engagement!

Stop the Clock is a free online game for telling time that kids love! Here's a strategy for using it with the whole class that will keep ALL students engaged!I recently had an opportunity to work with real kids again! I served as a math tutor for 3 days and worked with 3rd, 4th, and 5th grade students on time and measurement. I had never taught 3rd grade before, so I wasn't sure what to expect. When I found out that these students had not had any introduction to telling time that year, I figured it might become quite an adventure!

Luckily I discovered a set of student clocks in the classroom, and they were a huge help with making my lessons both hands-on and interactive. I also discovered a simple yet exciting interactive free game Stop the Clock that the children LOVED playing on the Smartboard!

The game involves matching digital clocks with analog clock faces, but the exciting part is that the game is timed. Students tap the "Stop the Clock" icon at the bottom of the board when they finish matching the clock faces. Their playing time is displayed if they are correct, and if they are not correct, they receive a prompt to try again. Since I was teaching a small group, each student had a chance to try to beat the best time.

Where to Find the Free Stop the Clock Game
One thing I love about Stop the Clock is that there are several variations of increasing difficulty, from telling time to the half hour to telling time to the minute. Click here to find all of the levels listed at the bottom of my Time and Measurement page on Teaching Resources. If you haven't played the game, I suggest doing so before you read on because playing the game will help you to understand my variation described below.

Boosting Engagement with Dry Erase Boards
When played in the traditional way, Stop the Clock is fun. However, it concerned me that most of the kids were watching while one student was at the board. I ended up adapting the game so that they could ALL be engaged each time a new set of clocks was displayed.

Stop the Clock is a free online game for telling time that kids love! Here's a strategy for using it with the whole class that will keep ALL students engaged!


How I Modified Stop The Clock
    Stop the Clock is a free online game for telling time that kids love! Here's a strategy for using it with the whole class that will keep ALL students engaged!
  1. I gave every student his or her own dry erase board and a marker. 
  2. I started the Stop the Clock game on the Smartboard. As soon it started, I picked up the Smartboard pen. If you've ever used a Smartboard, you know that picking up the pen will freeze the board. 
  3. While the clocks were frozen and the time was no longer counting down, I used the pen to to write a number from 1 to 5 next to each analog clock (see above.)
  4. I asked students to number their individual dry erase boards from 1 to 5 and record the digital time for each clock next to its corresponding number (see illustration). Stopping the clock during the game took away the pressure of having to beat the clock, and it gave all students a chance to become engaged in the practice session. 
  5. When everyone finished writing the times on their dry erase boards, I chose one student to come to the Smartboard . 
  6. As soon as the student touched the Smartboard, it "unfroze," and the time started counting up again. The student quickly dragged the drag the digital times to match the analog clock faces and touched the Stop the Clock symbol to stop the clock and see his or her time.  
  7. Finally, all of the students checked the answers they had written and compared them with the answers on the Smartboard. As I reviewed the dry erase boards, I could immediately tell who needed additional help.
Math Games for Telling Time and Elapsed Time

My only regret for the week was that we were not able to use my two math games, Racing Through Elapsed Time and Monster Math Mix-up Telling Time. The games include clock task cards and word problems with elapsed time. They're lots of fun and a great way to practice telling time and elapsed time. But I only had two 50-minute class periods to teach the students how to tell time, and these children were ones who had been struggling in their regular classrooms.

I opted to spend more time building a firm foundation with learning how to read an analog clock instead of moving on to something that would have confused them. Hopefully their teachers will work on this skill later in the year. These two games make great math centers to review the skills throughout the year.

What was my biggest ah-ha moment about teaching time?
It seems silly, but I remember the moment when I realized why my students were having trouble telling time to the nearest 5 minutes. In order to do that, you need to know your 5 times tables! If the minute hand is pointing to the 8, you need to know that 5 x 8 is 40 without having to count on your fingers. I expected that students at the end of 3rd grade would know their 5's fluently - my mistake! So we stopped and did some times table drills just on the 5's and they did much better. It's just one more example of how lack of fluency with times tables can negatively impact other areas in math - and why I wrote Mastering Math Facts! I know 3rd grade teachers are probably giggling about my ah-ha moment because they've been through this experience time and again, but I just had to share! :-)

So I survived my adventures teaching 3rd graders how to tell time! What are your best tips for teaching kids to tell time? Visit my Time and Measurement page on Teaching Resources for more freebies on this topic!