December 24, 2017

40 Hour Teacher Workweek Club Membership Giveaway


I've been raving about Angela Watson's 40 Hour Teacher Workweek Club for years because I truly believe that it's a life-changing resource. The 40 HTW Club will be open to new members starting on December 30th, and the good news is that you might be able to enroll in the club for free! Read on to find out how to enter my 40 HTW Club membership giveaway.

The 40 Hour Teacher Workweek Club is a teacher productivity course that has helped thousands of teachers find work/life balance. If you aren't familiar with how the program works, the best way to learn about it is to explore the resources on the 40 HTW Club website. Be sure to read some of the glowing testimonials from teachers who have already joined the club, and take this personalized quiz to find out if the program is right for you.

If you're convinced that the 40 Hour Teacher Workweek Club is exactly what you need to achieve work/life balance, you have two options. You can purchase a membership when the club opens on December 30th or enter the giveaway now and cross your fingers! 

How to Enter the 40 HTW Club Membership Giveaway
Click over to my Teaching Resources Facebook page and comment on the giveaway post before 9 pm ET on December 29th. Explain why you want to win a membership in the 40 Hour Teacher Workweek Club, and how you expect to benefit from the club resources. In your entry, please share the grade level and/or subject area you teach, too. The more detail you include in your entry about why you want to win, the better your chances of winning.

More Giveaway Details You Need to Know 
  • The giveaway ends on December 29th at 9 pm ET. 
  • 40 HTW Club membership is not transferable, so only enter if you want to become a member yourself. If you're already a member and you know someone who could benefit from joining the club, please share the giveaway details with him or her. 
  • There's no limit to the length of your entry, but your entire entry needs to be contained in a single comment on this membership giveaway Facebook post
  • After the giveaway ends on December 29th, I'll use a random-selection app to select 10 entries from all of the comments on the giveaway Facebook post. After reading all 10 entries carefully, I'll personally select the final winner. 
  • On the morning of December 30th, I'll send an email to my Candler's Classroom Connections subscribers to announce the winner's name. If you are not on my email list, sign up now so you'll be sure to receive this notification. (You'll get access to over 75 free resources, too!)
If you have questions about the 40 HTW Club and would like to connect with teachers who are already enrolled in it, join my Facebook group, Teachers Working Smarter. It's a private group, so you'll need to fill out this Google Doc form to request access. After you're in the group, you can ask anything you'd like and you'll get answers from teachers who are in the club.  

Are you ready to achieve work/life balance? Angela Watson's 40 Hour Teacher Workweek Club has the all the tools you need to make it happen! You might get lucky and win a free membership, but if you don't, I encourage you to purchase a membership on your own. I can guarantee that if you do, you'll make 2018 your best year ever!  


Disclaimer: The links in this post are affiliate links which means I earn a commission if you purchase a membership after clicking on my link. However, I can promise you that I would never promote a product or service to my followers if I didn’t believe in it 100%. Angela is the creator of The Cornerstone For Teachers blog, and if you follow her, you'll know she's amazing.

December 20, 2017

How to Trim HOURS Off Your Teacher Workweek NOW!

It's hard to believe that the typical workweek is 40 hours, because a 40-hour workweek seems like an impossible dream to most teachers. When you add up the time spent planning lessons, prepping materials, teaching students, attending meetings, grading papers, and contacting parents, it's easy to understand why most teachers work 50, 60, or even 70 hours a week!

Teachers don't necessarily WANT to work this many hours, but they don't believe it's possible to work less time and still be effective. I used to feel that way, too, but I was wrong. 

My eyes were opened when I watched Angela Watson's online workshop for teachers, Trim Three (or More!) Hours Off Your Workweek NOWEvery time she introduced a new productivity strategy, I thought, "Wow! Why didn't I think of that?!  I was amazed at the number of productivity tips and simple strategies she was sharing that could easily trim HOURS off a teacher's workweek!

When Angela said that making a few small changes can make a big difference in your workload, it was like a light bulb went off in my head! I realized that the most important thing we have to change is our mindsets. When we adopt a growth mindset and open ourselves to new possibilities, we start to see dozens of ways to save time and be more productive!

Watch Angela's free online workshop to see what I mean. This training will only be free until January 9th, so take time to watch it now while it's free.

Supercharge Your Results with the  40 Hour Teacher Workweek Club!


If you like the strategies Angela shares in the webinar,  take it a step farther by joining her 40 Hour Teacher Workweek Club. If you do, I guarantee that you'll get even more drastic results!

According to a recent survey, club members who completed the course cut an average of 11 hours from their workweeks! Holy cow! That's over 500 hours a year!

I've written several posts about the 40 HTW Club because it's an amazing resource for teachers. I truly believe that if you can achieve work/life balance, you'll be a happier and more effective teacher, and this club will give you the tools to do that.

If you'd like to learn more about why the club is so amazing, read New Year's Resolutions that Will Help You Keep the Joy in Teaching and How to Get Organized and Keep the Joy in Teaching.

If you'd like to spend less time working, but you just don't think it's possible, you NEED to watch Angela Watson's free online training, Trim Three (or More!) Hours Off Your Workweek NowIf you implement just a few of the tips you learn, you'll be able to cut hours from your workweek with very little effort, and you'll be that much closer to achieving work/life balance!


Disclaimer: I'm an affiliate of Angela's 40 HTW Club which means I earn a commission each time someone purchases the course after clicking on my affiliate link. However, I would never recommend a course to you unless I was convinced it was absolutely amazing! I can assure you that if you're willing to do the work, your results will be amazing, even life-changing!

September 23, 2017

MI Theory and Growth Mindset: Helping Kids Discover their Strengths and Overcome Challenges


Multiple Intelligence Theory and the research on Growth Mindset offer us insight into how the brain works, what it means to be intelligent, and how we respond to the challenges of life. Both frameworks have important implications for teaching and learning, and they’re even more powerful when implemented together. In this post, I’ll explain why I think it’s important to teach students about multiple intelligence theory and growth mindset, and I’ll wrap up by sharing a step-by-step process for teaching your students how to discover their own unique strengths and use them to develop strategies for overcoming challenges. I used three MI theory and growth mindset resources in that lesson, and you may want to download those freebies before you read the lesson.   

Multiple Intelligence Theory
Psychologist Dr. Howard Gardner proposed multiple intelligence theory over 40 years ago in response to the prevailing belief that intelligence was a one-dimensional trait, and that a persons’ IQ was fixed at birth. Dr. Gardner disagreed with this limiting view of intelligence and suggested a multi-dimensional approach. According to Dr. Gardner, “Human cognitive competence is better described in terms of a set of abilities, talents, or mental skills which we call ‘Intelligences.’ These multiple intelligences can be nurtured and strengthened, or ignored and weakened.”

MI theory was welcomed by most educators, especially those who recognized that children learn in different ways and that there that there are many paths to understanding. These teachers had already noticed that children learn best when they engage in activities that take advantage of their strengths, and MI theory made it possible to identify those strengths more easily.

Dr. Gardner identified at least eight types of intelligence, labeling with terms like visual-spatial, musical-rhythmic, mathematical-logical, and verbal-linguistic. Because this terminology was confusing for elementary students, some educators adopted the kid-friendly “smart” labels shown on the free MI theory posters on the right. I'll tell you where to find these freebie in just a moment. :-)

The Impact of Mindset on Success
More recently, Dr. Carol Dweck contributed to this field with her research on the connections between mindset and success. In a nutshell, Dr. Dweck observed that most people respond in one of two ways when facing challenges. Those who display a “growth mindset” enjoy solving problems and trying new experiences, and they choose challenging tasks over easy ones. They don’t view mistakes as failures, but rather as opportunities to learn and grow. On the other hand, people with a “fixed mindset” choose easy tasks over challenging ones, and they don’t enjoy taking risks or attempting to do something they’ve never done before. They view mistakes as failures to be avoided at all costs, and they are easily frustrated when they encounter difficulties. As you might expect, people who approach life with a growth mindset are more successful and happier than those with fixed mindsets.

Fortunately, Dr. Dweck’s research shows that a person's mindset consists of learned behaviors that can be changed. People who have a fixed mindset can develop a growth mindset if they are willing to change the way they think about themselves and about their capacity to learn.

The Problem with the Word “Smart”
Obviously, we want to foster growth mindsets in our students, which means adopting practices that encourage positive, growth-oriented thinking. Dr. Dweck discovered that some types of praise are harmful and can lead to a fixed mindset, so it's important to use praise effectively. As it turns out, praising children for being smart may cause them to avoid tasks that include a risk of failure because they are afraid of making mistakes.

Dr. Dweck’s findings resulted in an unfortunate backlash against MI theory. Some educators expressed concern about using the kid-friendly "smart" terms that refer to the multiple intelligences as the "8 Kinds of Smart." Surely the practice of teaching kids about all the ways people are smart will lead to our students developing fixed mindsets, right?

Personally, I  don’t see this happening if we’re careful about how we use the word “smart.” There’s a difference between praising kids for being smart and teaching children that people are smart in many ways. Furthermore, the use of the word “smart” should not be a reason to discount MI theory; Dr. Gardner never even used the word “smart” when referring to the multiple intelligences! Those kid-friendly terms were adopted by teachers to simplify the concepts for their students! If teachers aren’t comfortable using the word “smart,” they can easily replace it with one of the other words Dr. Gardner used to describe these intelligences such as, “skills, talents, or abilities.”

Why We Need to Teach MI Theory and Growth Mindset
Learning about growth mindset is important because it helps children understand that our brains can become smarter if we are willing to work hard, try new experiences, and accept challenges. Learning about multiple intelligence theory is important because it empowers students with the knowledge that there are many ways we are smart. Furthermore, by helping students identify their strengths, MI theory gives them the tools to they need to overcome challenges and develop a growth mindset.
 
How to Teach Kids to Use Their Strengths to Overcome Challenges
When you’re ready to introduce MI theory and Growth Mindset to your students, use this lesson sequence as a guide to help you get started. Click here to request all 3 freebies used in the lesson sequence, including the Getting to Know You Survey, the MI theory mini posters, and the Overcoming Challenges graphic organizers.

  1. Start by administering the kid-friendly “Getting to Know You” multiple intelligence survey, but don’t score it immediately or discuss the results with your students. Before you use the survey, please watch How to Use a Multiple Intelligence Survey to Foster a Growth Mindset. In this video, I explained how to administer the survey, how to score it, and how to discuss the results with your students from a growth mindset perspective. 

  2. Discuss the characteristics of a fixed mindset versus a growth mindset with your students. Draw a T-chart with the words “Fixed Mindset” and “Growth Mindset” above the two columns. Under each column, list several belief statements that represent each type of mindset, and discuss these beliefs with your students.

  3. Introduce the basics of multiple intelligence theory using Dr. Gardner’s original terminology or the kid-friendly terms. You can use the MI theory posters included with the free resources that go with this blog post. 

  4. Return the Getting to Know You MI Theory Survey to your students and show them how to score it. Discuss the survey results from a growth mindset perspective. Remind students that the results are only based on their answers to a few statements and they’re not permanent. This survey only provides a snapshot of their current strengths and growth areas. Avoid praising students for being “smart” in any of the multiple intelligence areas. Ask students to keep a copy of their survey results in a safe place such as a student portfolio or 3-ring binder.

  5. Teach students how to rely on their strengths to overcome challenges and problems. Growth mindset has been criticized for setting kids up for failure by teaching them that you can succeed at anything if you’re willing to try hard and never give up. I understand this concern, and I agree that trying harder won’t help a child who lacks the skills needed to accomplish a task and who has no idea where to turn for help.

    That’s why it’s important to teach students what to do when they get stuck. One method is to teach them how to brainstorm strategies for overcoming challenges that are based on their MI survey results. The Overcoming Challenges graphic organizer on the right can be used to guide your students through this process. There are two variations of the graphic organizer included in the free resources for his lesson; chose the one that best meets the needs of your students. Display a copy of the graphic organizer where everyone can see it. At the top of the page, write one challenge or difficulty that many of your student face, for example, “Learning multiplication facts quickly and accurately.” Next, circle one of the multiple intelligences listed at the bottom of the page (for example, "Visual-Spatial)") and write that term in the upper left corner of the chart under “Strengths.” Then ask your students to discuss how someone who is visual-spatial could use that strength to learn the multiplication facts. List those strategies next in the top row under the “Strategies” heading. One strategy would be to draw arrays for the multiplication facts the student is having trouble learning. Another one would be to draw intersecting horizontal and vertical lines for the factors and to count the intersections. After you've guided your students through this process several times, they may be able to complete the graphic organizer on their own or with a partner when facing a challenge.    

Do you see why it's important to implement MI theory and Growth Mindset together? These two frameworks will empower your students and will give them the tools to take ownership of their learning. With the right encouragement and support, your students will begin to believe in themselves and succeed in situations where they might have given up in the past.

I also believe that it’s important to have a full understanding of both concepts to implement them effectively in the classroom. If you’d like to learn more, check out my MI Theory and Mindset Bundle. This resource includes my MI Theory, Mindset, and Motivation professional development webinar and Multiple Intelligence Theory for Kids, a collection of lessons, activities, and printables. You can preview both items and purchase them separately or together in this bundle.

I hope you found these insights, resources, and strategies for implementing MI theory and Growth Mindset to be helpful. Remember that you can request all 3 freebies mentioned in this article by clicking here.

My blog post is just one of over a dozen articles in the Growth Mindset Roundup blog hop. Be sure to click on the links below to check out the other articles from some of your favorite teacher bloggers!

~ Laura Candler
Teaching Resources


September 15, 2017

How to Turn a Word Problem into a Rich Math Task (Part Two)

How to Turn a Word Problem Into a Rich Math Task
Part Two: Crafting the Process

When students struggle in math, it's often due to their beliefs about what it takes to be successful in mathematics. They believe that some people were born with a gift for math, and anyone who wasn't born with that gift will never excel in math.

Fortunately, brain research tells us that this belief is nothing more than a myth, and it's not supported by fact. All students can experience success in math if they are taught in ways that foster the development of a mathematical mindset. This means setting high expectations for all students, engaging them in challenging and interesting math tasks, and providing the right kind of support and encouragement.

One way to foster mathematical mindsets is to replace simple word problems with "rich math tasks." Rich math tasks provide opportunities for students to work together as they explore a concept or solve a problem. In my webinar, Math Problem Solving: Mindsets Matter, I give examples of rich math tasks and share several strategies for using them with students.

If you're wondering how to get started with rich math tasks, it's easier than you might think. The first step is choosing a suitable math problem, and the second step is guiding your students through the problem-solving process. Both steps are equally important, so I've decided to tackle them in two separate blog posts.

In my first post, Part One: Crafting the Problem, I explained the difference between word problems and rich math tasks, and I shared 6 tips for creating a rich math task from a simple word problem. In this post, Part Two: Crafting the Process, I'll share strategies you can use to actively engage ALL of your students in the problem-solving experience.

September 7, 2017

How to Turn a Word Problem into a Rich Math Task (Part One)

How to Turn a Word Problem into a Rich Math Task
Part One - Crafting the Problem

Growth mindset is much more than a buzzword, and nowhere is this more apparent than in mathematics. Research findings in this field are transforming our perceptions about best practices in math instruction. As it turns out, developing a mathematical mindset is more highly correlated with future success in math than scores on standardized tests!

One way to begin fostering a math mindset in your students is to turn traditional word problems into "rich math tasks."

I tackled the topic of rich math tasks in my recent webinar, Math Problem Solving: Mindsets Matter, but I want to dig into rich math tasks a bit more here on Corkboard Connections.

Rich math tasks have two critical components, the WHAT (the problem) and the HOW (the process).

In this post, we'll take a look at how to transform a boring word problem into a rich math task. In my next post, I'll share active engagement strategies you can use to help your kids rock the problem solving process! Click here for Part Two.

How a Word Problem Differs from a Rich Math Task


Basic Word Problems
Word problems at the elementary level tend to be simple problems with a single correct answer. Children are often taught to solve them by learning to identify key words and numbers in the problem and then applying the necessary mathematical operation. For example, a basic word problem might read like this: "There are 10 apples, and it takes 2 minutes to peel each apple. How many minutes in all are needed to peel the apples?"
A typical method of solving this problem involves underlining the key words "each" and "in all" and circling the numbers 10 and 2. The key words tell students that they need to multiply the numbers to find the answer, so they multiply 10 and 2 and record the number 20 as the answer. If you ask these students to draw or model the solutions visually, they are at a loss. If you ask them to label the answer with the unit, they are as likely to write "20 apples" as they are to write "20 minutes." 

Word problems don't inspire deep thinking, analysis, or discussion because the solutions are fairly straight forward. Sure, you can encourage your students to talk with a partner about how they solved the problem, but their explanations will sound like this: "First I underlined the key words, and then I circled all the numbers. Next, I multiplied the numbers to get my answer." An explanation like that hardly qualifies as "math talk"!

Rich Math Tasks
Rich math tasks, on the other hand, are usually more open-ended and can be solved in many ways. Some math tasks are inquiry-based questions that have more than one correct answer or problems that require students to use hands-on materials to discover the solutions. Other math tasks look like regular word problems at first glance, but when you attempt to solve them, you realize there are many ways to arrive at the answer. Rich math tasks don't have key words that you can underline, and circling the numbers won't help because you might not even need all the numbers to solve the problem! These types of math tasks stimulate discussion, questioning, and critical thinking as students struggle to choose the best strategy to solve the problem.


6 Tips for Crafting an Awesome Math Task

Finding or creating the right math problem is the first step in developing a rich math task. Here are some tips that will make the process of crafting your problem much easier.

1. Start with a Visual Problem
Select a word problem that's easy to visualize, and try to solve it in several different ways. Make sure the answer can be represented visually by drawing it or by using physical models. If you realize that there's only one way to solve it or that it would be difficult to represent the solutions visually, rewrite the problem or find a new one. I'll use the Apple Peeling Word Problem above to demonstrate how to turn a simple word problem into something much more challenging and interesting.

2. Remove Key Words 
After you've selected a problem, look for key words such as, "in all," "each," "per," and "total." If possible, rewrite the problem without using the key words, making sure that the meaning doesn't change. Removing key words forces students to THINK about which operation is needed instead of just underlining words and mindlessly choosing an operation based on those words.

3. Add Extra Details and Information
Next, add details that aren't really needed to find the solution. If students have been trained to underline key words and circle numbers, these extra details will confuse them. They will have to think about the task and decide which words and numbers are actually important.

Let's use the first 3 tips to rework the Apple Peeling Word Problem and turn it into Apple Peeling Challenge #1. While the problem is still quite easy, the lack of key words and the extra numbers make it a bit more challenging. Students have to think about what is being asked and decide the best way to solve it. This is a good starter problem for introducing students to rich math tasks because it can be solved in more than one way using visual models. Students could draw circles for the apples, use round objects like pennies or bingo chips, or they could even use real apples!


Ready to take Apple Peeling Challenge #1 to another level? Applying the next 3 tips to that problem will make it even more challenging and interesting!   

4.  Personalize It and Make It Real
To make the problem more interesting, personalize it by adding a real person's name, maybe even the name of one of your students! Add enough details to make it come to life or turn it into a story. In Apple Peeling Challenge #2, including the detail that Sam is peeling the apples for a pie makes the problem more meaningful. A teacher in the Math Mindset Connections Facebook group took this problem and turned it into a story about making a pie for Thanksgiving dinner!

5. Turn It into a Multi-step Problem
Rewrite single-step word problems to ensure that multiple steps are needed to solve it. The information in the basic word problem stated that it takes 2 minutes to peel each apple. The easiest way to add another step is to replace that detail with enough information for students to calculate how long it takes to peel each apple. Each problem will be a bit different, but there's always a way to modify the problem and turn it into a multi-step math task.

6. Change the Numbers
You can often make a word problem more challenging by changing the number values. For example, instead of Sam peeling 10 apples, he might need to peel 100 apples because he's baking 10 pies for a banquet. You can also use numbers that result in fractional answers. For example, in Apple Peeling Challenge #2 above, Sam can peel 4 apples in 6 minutes so kids should be able to figure out how long it takes to peel one apple. But 6 is not divisible by 4, so the number of minutes it takes to peel one apple is not a whole number. Do you see how tweaking the numbers a little can instantly make the problem much more challenging? Now you have a problem that's perfect for a math task!

Why not try creating your own Apple Peeling Challenge? In the Math Problem Solving: Mindsets Matter Webinar, I shared 2 more apple peeling problems that are quite different from the problems in this post. I'll bet you can come up with your own apple peeling problems, too!


Where to Find Editable Word Problems for Rich Math Tasks


If you don't want to craft your own multi-step word problems, or you don't have time to hunt for them, check out my newest product, Math Mindset Challenges. It's a growing collection of editable word problems in several different formats. The problems themselves are in an editable PowerPoint document so you can change the wording and customize them if needed. All of the problems have been field-tested by upper elementary teachers, and they work well as is, but if you use a different measurement system or want to tweak the problems using the tips above, you can easily do that. If you'd like to take a closer look, head over to my TpT store and click on the preview link on the product page.


The Math Mindset Challenges product shown above is included in my Math Mindset Challenges Webinar Bundle and my Math Problem Solving Bundle. Both bundles include the Math Problem Solving: Mindsets Matter professional development webinar, too.


Next Up - Part Two: Crafting the Process

Remember that rich math tasks have two essential components, the WHAT and the HOW.  In this post, I've tackled the WHAT, the math problem itself.  However, it's not enough to create a great word problem; it's what you do with that problem that counts! Click here to read Part Two, Crafting the Process, where I dove into HOW to facilitate the problem solving experience. I shared loads of active engagement strategies that will take problem solving to a whole new level in your math classroom!


August 25, 2017

Mathematical Problem Solving: Mindsets Matter


Do you love math? Or are you convinced that the math train left the station without you long ago? No matter how you feel about it, if you're an elementary educator, you'll probably have to teach math at some point. Fortunately, growth mindset research and new findings about how the brain works are leading to some amazing insights about the best way to teach math. Furthermore, these insights are making it possible to foster a love of math in ALL students!

Last year I discovered Dr. Jo Boaler's book, Mathematical Mindsets, and I was fascinated by the research findings she shared. I also loved Dr. Boaler's strategies for using those research findings to improve math instruction. I know that problem solving is essential in mathematics, and most of the strategies I was using are supported by the new research. However, I did discover that a few of my teaching methods are not actually best practices, so I've been reworking those strategies to incorporate what I've learned.

A few years ago I presented a webinar called Math Problem Solving: Once a Day, the Easy Way, but after reading Mathematical Mindsets, I knew it was time to update that presentation with these new research-based practices. I asked Dr. Boaler for permission to include information and strategies from her book in my webinar, and she graciously agreed.

My new webinar is titled Math Problem Solving: Mindsets Matter to reflect the emphasis on growth mindset research and its implications for math instruction. To learn more, download the webinar note-taking handouts and take a look. The live webinar has ended, but you can sign up for the replay below. The replay of the August 31st webinar is free through September 10th.

Math Problem Solving - Mindsets Matter 

Best Practices in Math Instruction: Agree or Disagree? 
At the beginning of the webinar, I'll ask you to evaluate 6 commonly-held beliefs about math instruction, and then I'll share what the research tells us about them. What do you think about each statement below? Do you agree or disagree with these beliefs about math instruction?
  1. Problem solving strategies should be taught before giving students problems to solve. 
  2. Drawing solutions and counting on fingers should only be encouraged for young children and struggling students. 
  3. Students should only use calculators in math after they can perform the computations by hand.
  4. Mistakes are only beneficial when we learn from them.  
  5. Some people were born with a gift for math, and others weren’t. 
  6. The best way to meet the needs of all students is through ability grouping and differentiation. 
If you want to know what the research says about these beliefs, watch the webinar replay! I dug into the best practices related to each of those statements about math instruction.

From Word Problems to Rich Math Tasks
One research finding about how to foster a mathematical mindset is pretty clear. Instead of overloading kids with traditional "word problems," we need to engage them in more in rich math tasks. In the webinar, I went into detail about what that means, but basically a rich math task encourages students to think about math in new ways, finding multiple ways to solve problems, and to discuss their findings with others. Fortunately, it's quite easy to find rich math tasks if you know where to look, and you can also turn traditional word problems into rich math task. Check out the webinar replay for tips about how find or create rich math tasks that are appropriate for your students.


Join Me for a Math Mindsets Webinar Journey!
I'm still learning about how to foster a mathematical mindset, so I consider this webinar to be more of a journey we'll take together. You can board the Math Problem Solving: Mindsets Matter webinar train here; tickets are FREE through September 10th, so hop on and take a seat now!

I'll be your conductor if you decide to take this journey with me, and I'll share what I've learned about growth mindset and math instruction. We'll wrap up our adventure by exploring painless problem solving strategies you can implement right away that will motivate your students to love math, even if you don’t! Who knows? By the end of our journey, you might be a math lover, too!


August 13, 2017

Discover MrOwl, a Free New Tech Tool Teachers Will Love!

Have you discovered MrOwl? It's a free, new tech tool you can use to create a personalized Internet experience based on the topics that are important to you. You can easily build, organize, and customize topic “branches” that you share with friends and family. It's completely free of advertising, too. These features make MrOwl the perfect tool for educators who can use it in the classroom with students and on their own for organizing lesson resources.  You can even use MrOwl to create a free class website!

Using the MrOwl Chrome extension, you can easily save your favorite website links so you know where to find them later. Furthermore, you can upload your own documents and photos to your branches, making it easy to create comprehensive collections of searchable information.

A unique feature of this platform is that MrOwl gets wiser as more people use it. The branches that you build help to shape the MrOwl community “tree,” an ever-growing, searchable collection of web links and resources. These branches are curated by real people in the MrOwl community, not a computer, so they're free of inappropriate content and organized in a way that makes sense. MrOwl is free of advertising, too, so you aren't distracted by annoying pop-ups or sidebar ads.

But MrOwl is more than a safe search engine or a handy bookmarking tool; it's also a unique social media platform that makes it easy to interact with others who share your interests. MrOwl community members can follow other users, message their own followers, and even invite people to collaborate with them on their branches. It truly couldn't be any simpler! Members can also grab, "heart," and share branches created by others.

Discover MrOwl in a Free Live Webinar 

To help teachers get started with MrOwl, I developed a webinar called Discover MrOwl: A Free Tech Tool for Organizing, Sharing, and Collaborating. The next live presentation will be on January 24th at 8 pm Eastern Time.  MrOwl is brand new, so if you like exploring new tech tools, you'll love this webinar! MrOwl is a really powerful tool with a lot of cool features for teachers and even more on the way. During the webinar, I'll explain exactly how to get started setting up a profile, creating topic branches, organizing your content, and collaborating with others. I'll even explain how to use it to set up a free class website!  You'll also meet Becky and Arvind Raichur, the founders of MrOwl!


Explore MrOwl on Your Own
If you can't wait for the webinar, register for a free account on MrOwl and start exploring the platform on your own! To see how it works, click over to my profile page, @laura_candler, and check out some of the branches I've created. It's easy to create a free MrOwl account, but be sure to choose a user name that you don't mind being public and visible to others. I recommend using your real name if it's available, which is why I signed up with @laura_candler. After you log in, return to my profile page and follow me! Then grab any branches that you like to save them for later and explore MrOwl to find new interests and get inspired!


The MrOwl Backstory
MrOwl is the brainchild of Becky and Arvind Raichur, and their vision dates back almost 20 years to 1999, a time before Google and Pinterest when it was nearly impossible to search the web. Becky and Arvind envisioned making the Internet a better experience for everyone, where it's easy to organize and curate collections of searchable links, documents and more in one convenient place. Their ultimate goal was to create a connected community curated by real people like you, not a computer. The word "crowdsourcing" wasn't coined until 2005, but the concept describes their early vision perfectly!

It wasn't until 2013 that they were able to put together a team to bring MrOwl to life, and it's taken the team several years to build and test the site. During that time, they've added new features that make MrOwl more interactive and easier to personalize. MrOwl began as a web-based platform, but a convenient mobile app was just released so that you can access MrOwl right from your phone or tablet.

Reaching Out to Educators
Now that MrOwl is available to the public, Becky and Arvind are eager to spread the word so that others can benefit from this free tool. They're especially excited about MrOwl's potential for classroom use, which is why they reached out to me. They initially just asked me to review the site and offer feedback about how to make it even more useful for teachers. After I spent time on MrOwl, I realized that it's far more powerful than it appears at first glance, and I knew that I had to share it with others! I was also impressed with Becky and Arvind's sincere desire to make MrOwl even more useful for teachers and more approriate for students. They've already started working on some new features, such as templates teachers can use to create free class websites, and they're open to your feedback and suggestions as well.

Join the MrOwl Educators Facebook Group
I've also created a Facebook group called MrOwl Educators where teachers can learn about new features and get early access to them. Group members can also ask questions and share their ideas for using MrOwl in the classroom. A third function of the Facebook group will be to seek feedback about how to make MrOwl even better for educators, and this information will be shared with Becky and Arvind. If you'd like to join the MrOwl Educators Facebook group, fill out this Google Doc form and follow the directions on that page to request access.

Can't Wait to Get Started?
If you can't wait to get started with MrOwl, jump in right now and register for your free account. It's easy! Remember that your user name will be public and visible on your profile, so you may want to choose your real name to make it easier for others to find you. Set up your profile by uploading a photo, writing a short bio, and adding links to your social media platforms. Then have fun exploring the site and starting to create your own branches. I hope you enjoy using MrOwl in your classroom!


August 6, 2017

Totality Awesome Solar Eclipse: Are you ready?

Are you ready for the upcoming solar eclipse? If not, take a few minutes now to learn about this "totality" awesome event so you can prepare for it properly and enjoy it safely.

On Monday, August 21st, the moon's shadow will pass over the US in a sweeping arc, from Oregon to SC, and if you're lucky enough to be directly in that path, you'll see a total solar eclipse. As the moon passes between the earth and the sun, blocking the sun's light, the sky will darken and temperatures will drop, right in the middle of the day. Eventually, the moon will completely block the sun for 2 or 3 minutes, and all you'll see is the sun's corona, which appears as a faint glow around the edges of the moon.

Sounds amazing, doesn't it? Unfortunately, the path of totality will only be about 70 miles wide, so very few viewers will experience the solar eclipse as dramatically as the picture on the right. Everyone else in the US will see a partial eclipse, even those who are just a few miles away from the path of totality. The farther away you are from that path, the less the moon will block the sun, and the less dramatic the event will be.  From what I've learned, if you're even a few miles outside of that path, the eclipse won't be nearly as spectacular as if you were directly in the path.

But what if you learned that you're less than an hour's drive from the path of totality? Would you make plans to go experience the real deal, or would you be content to see a partial eclipse? How far would you travel to see a total eclipse?

Locate the Closest Place to View a Total Eclipse
Before you answer,  take a minute to find out how far you live from totality. It's really easy when you download the free Totality app from Big Kids Science.

After you open the app and enter your location, you can see the closest place to view a total eclipse, and you'll even be able to get directions to it! You can also learn what the partial eclipse will look like at its peak in your location, how to get to the closest place to see the total eclipse, when the eclipse will begin and end, and much more. The app also includes links to lesson ideas and activities for teaching about the solar eclipse.

Order Your Protective Eye Wear Now 
No matter where you live in the US, if the sky is clear on August 21st,  you'll be able to see a partial eclipse, if not a complete, total eclipse. It's never safe to look at the sun, except for the 2 or 3 minutes of totality when the sun's rays are completely blocked, and only for those who are in the path of the total eclipse. So if you plan to watch the eclipse at all, you'll need protective sunglasses. They are readily available and not very expensive right now, but I guarantee they are going to be much harder to find and more expensive if you wait until the last minute to get them.

I ordered mine from Big Kids Science, the creator of the free Totality app, because I like to support organizations that offer free educational resources like the app. I purchased mine from within the app, but you can also purchase them directly from the Big Kids Science website.

Solar Eclipse 2017 or Bust!
The last total solar eclipse that was visible in the United States happened back in 1970, and it passed right over North Carolina where I live now. Unfortunately, I didn't move to NC until 1973 so I missed it! :-( I lived in New Hampshire at the time and I remember seeing a partial eclipse, but the experience wasn't all that memorable.

That's why I was excited to discover that the path of the 2017 solar eclipse will go through South Carolina which is just a few hours south of where I live now. I learned from the Totality app that even if I stay right where I am, I'll see a very distinct partial eclipse with 96% coverage of the sun. I guess I could be satisfied with 96% totality, but the more I thought about it, the more I realized that this will be my last chance to see a total eclipse, so driving a few hours to see it will be "totally" worth it! I've heard the traffic that day will be insane anywhere within the path of totality, so I booked a hotel room in Orangeburg, SC, which is in the direct path of the moon's shadow. Now my only concern is the weather, and I'm praying for clear skies on August 21st.

How close are you to the line of totality for the 2017 solar eclipse? Are you planning to travel to see it? If so, take plenty of food and water with you, and be sure to start your trip with a full tank of gas. Scope out your viewing location in advance and arrive well before the partial eclipse begins. Finally, remember to bring your totality awesome protective sunglasses!


July 21, 2017

Teaching Tricky Trapezoids: Inclusive vs. Exclusive Definitions


Why Your Students Might Not Be
Classifying Trapezoids Correctly 


Do you teach quadrilateral classification? If so, did you know there are THREE ways to define a trapezoid?

Americans use either the inclusive or the exclusive definition depending on their curriculum. To complicate matters even more, teachers who live outside the United States define trapezoids in a completely different way! Believe it or not, the British English definition is the exact opposite of the two American definitions!

Which definition are you supposed to be teaching? If you're not sure, it's entirely possible that you're teaching the wrong definition! But don't feel bad if you discover this to be true because you are not alone. In fact, until recently, I didn't even know which definition was used by the Common Core State Standards!

Before we dig into this topic, you need to know which definition you're currently teaching. To find out, answer the trapezoid question below before you read the rest of this post. Then read the information under the 3 polygons that explains what your answer means.

What Your Answer Reveals

Because there are three ways to define a trapezoid, there are three correct answers to the question. Your response will reveal the definition you use to classify trapezoids.
  • If you only chose polygon 3, you use the exclusive definition which states that a trapezoid has EXACTLY one pair of parallel sides. This is the definition that I learned, and it's the one I thought the Common Core used (but I was wrong).  
  • If you chose polygons 1 AND 3, you use the inclusive definition which states a trapezoid has AT LEAST one pair of parallel sides. Many educators favor this definition because the other quadrilateral definitions are inclusive. For example, a parallelogram is a 4-sided figure with both pairs of opposite sides parallel, which means that squares and rectangles are also parallelograms. 
  • If you only chose polygon 2, you're using the British English classification system which states that a trapezoid is a quadrilateral with NO parallel sides. You teach your students that a quadrilateral with one pair of parallel sides is a trapezium, not a trapezoid


Which definition SHOULD you be teaching?

Now you know which definition you use to classify trapezoids, but is that the definition you're supposed to be teaching? If you aren't 100% sure, make a note to check on it. Until recently, I thought the Common Core used the exclusive definition, but I discovered that the CCSS actually uses the inclusive definition! I posted a question on my Facebook page to find out which trapezoid definition most teachers were using, and over 180 people responded. I was surprised to learn that most teachers who follow the CCSS teach the inclusive definition.

How to Teach Kids to Classify Tricky Trapezoids

If this is the first you've heard that there are three ways to define a trapezoid, you might be wondering how much to share with  your students. I mean, quadrilateral classification is challenging enough to teach without having to explain that there are three different correct ways to define a trapezoid!

I recommend that you find out which trapezoid definition you are expected to teach, and only teach that ONE definition. You could tell your students that they might learn a slightly different definition at some point in the future, but if you go into too much detail, your students will end up more confused than ever.

After you know which definition you're supposed to be teaching, how do you introduce it to your students and help them learn to classify trapezoids correctly?

I've found that the best way to help your kids teaching those tricky trapezoids is with a simple sorting activity. There are two versions of this activity, and it's best to use both of them if possible. The first is a printable, hands-on activity for math partners which is great for guided practice. The other is a Google Slides activity you can assign in Google Classroom for additional practice or assessment. Both activities are included in the Sorting Tricky Trapezoids (or Trapeziums) freebie below. The directions in this post explain how to conduct the teacher-guided partner activity; directions for using the Google Slides version are included in the freebie.


Trapezoid (or Trapezium) Sorting Directions for Partners:
  1. Begin the activity by introducing the characteristics of a trapezoid (or trapezium) according to the definition you are expected to teach. 
  2. Next, pair each student with a partner and give each pair one copy of the Quadrilaterals to Sort printable. Ask them to work together to cut out the polygons and stack them in a pile. 
  3. Explain that they will take turns sorting the quadrilaterals into one of two categories using the T-chart. Give each pair a copy of the T-chart or have one person in each pair draw the T-chart on a dry erase board. 
  4. Before guiding them through the sorting activity, assign the roles of Partner A and Partner B in each pair. Then ask Partner A to select the first quadrilateral and place it in the correct column on the T-chart. Partner A then explains the quadrilateral's placement to Partner B who gives a thumbs up if he or she agrees. If Partner B does not agree, the two students should discuss the proper placement of the quadrilateral and move it to the other column if needed. 
  5. Partner B then chooses one of the remaining quadrilaterals, places it on the chart, and explains its placement to Partner A. Partner A must approve the placement, or the two students discuss the definition and placement before continuing. 
  6. Students continue to switch roles throughout the activity. If they aren't able to agree on the placement of one of the quadrilaterals, they should set it aside for the time being. 
  7. As students are working, walk around and observe them to see if they are classifying the trapezoids correctly. Stop to help students who are confused or who can't agree on the placement of one or more quadrilaterals. 

Hands-on Activities for Classifying Quadrilaterals

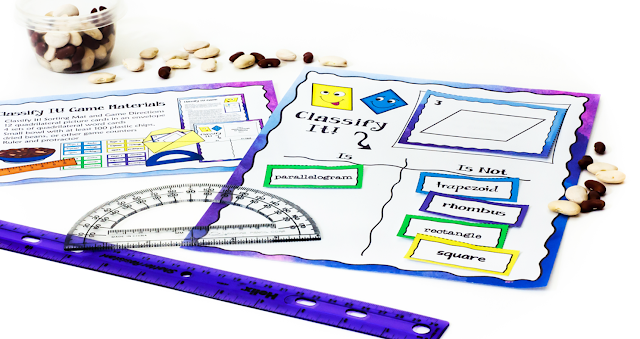
This simple sorting activity is actually one of the most effective ways to teach kids to classify any type of quadrilateral. In fact, it's so effective that I developed a complete lesson for classifying quadrilaterals based on this strategy. Classify It! Exploring Quadrilaterals includes several introductory activities as well as a challenging game and two assessments.


One reason I wanted to bring the tricky trapezoid situation to your attention is that I've recently updated Classify It! Exploring Quadrilaterals to include all three definitions. There are now THREE versions of the lesson materials within the product file.

No matter which definition you're supposed to be teaching, Classify It! Exploring Quadrilaterals has you covered. You'll find lessons, printables, task cards, answer keys, and assessments that are aligned with the quadrilateral classification system used by your curriculum. Not only are these activities engaging and fun for kids, the lessons will help them nail those quadrilateral classifications every time! If you don't believe me, head over to see this product on TpT where you can read feedback from 400 teachers who have used Classify It! Exploring Quadrilaterals with their students.


By the way if you already own Classify It, you can download the updated version for free by clicking over to the Classify It! Exploring Quadrilaterals page on TpT. If you're logged in, you'll see a link at the top that says "Download Now! You own it!"

If you teach quadrilaterals and haven't purchased it yet, take a few minutes to preview it on TpT. If you use it with your students, I think you'll agree that Classify It is the most effective and FUN way to foster a deep understanding of quadrilateral classification!


July 8, 2017

How to Teach Addition of Fractions Using LEGO Bricks


Guest blog post by Dr. Shirley Disseler

We know that current math standards require students to learn through modeling using manipulatives. I have been using LEGO bricks for many years to teach students math concepts throughout the elementary and middle school curriculum. It’s a perfect math manipulative, and students love using the bricks, since many students are very familiar with them. I’ve developed specific strategies for teaching math using LEGO bricks for modeling and have been thrilled over the years to watch students’ test scores improve after they learn math using these strategies.

In recent years, I’ve taught many graduate students at High Point University how to teach with these methods, and they also report great success for their students when they use the techniques as new math teachers. I’ve recently published a series of books that show how to utilize LEGO bricks to teach all the major math topics in elementary school: Counting and Cardinality, Addition, Subtraction, Multiplication, Division, and Fractions.

Free LEGO Fractions Book
I’d like to share an example of how to teach using LEGO bricks. This is a strategy for teaching how to add fractions that have like denominators. It's one of the lessons in my book, Teaching Fractions Using LEGO® Bricks, which is a part of my Brick Math Series. If you'd like to see more fraction lessons, you can download the entire PDF of this book as a sample of the series! Click here to request your free copy.

Adding Fractions with Like Denominators
Teaching students to add fractions can be a challenge. Students must first understand that a fraction shows part of a whole. This method of modeling fractions with bricks helps students see clearly what the parts of the fractions mean, and how only the numerators are added, since the two fractions are part of the same whole.

Let’s add the fractions 1/6 and 2/6 together to show how the process works.
  1. First, build models of the two fractions on a baseplate using LEGO bricks. The baseplate is an important component of Brick Math, because it keeps all the bricks in place. 
  2. Start to model the two fractions, denominators first. Use a 2x3 brick (6 studs) to model the denominator of 6. Use two 2x3 bricks that are the same color, to help students understand that the denominators are the same. Leave a little space between the two 2x3 bricks.
  3. Model the numerator of the fraction 1/6 by placing a 1x1 brick above the first 2x3 brick. Model the numerator of the fraction 2/6 by placing a 1x2 brick above the second 2x3 brick. Using different color bricks for the numerators helps to show they are not the same.


  4. Now it’s time to model the action of adding the two fractions. Take another 2x3 brick and place it at the bottom of a baseplate. Place the 1x1 brick above this 2x3 brick. Then place the 1x2 brick above the 1x1 brick. Your model now shows 3 studs over 6 studs. Take three 1x1 bricks and stack them on each stud of the combined numerator bricks. Have students touch each stud to count 3 as the numerator of the solution fraction of 3/6 .
  5. If your students are ready for it, you can demonstrate how 3/6  = 1/2 . Place a 1x3 brick on top of the three 1x1 bricks in the model and show students that the 1x3 brick (modeling the numerator) is 1/2 the 2x3 brick (modeling the denominator).


  6. The final step in the process is to have students draw their brick models on baseplate paper. Drawing the models they have built helps students reinforce the visual depiction of the mathematical concepts. Baseplate paper is included in my book, Teaching Fractions Using LEGO® Bricks, which is a free sample of my Brick Math Series books.
When you take students through the modeling process, you give them a powerful way to visualize the action of the math. For both visual and tactile learners, this method helps student understand how to add fractions that are part of the same whole.


See Two Fraction Lessons in Action on YouTube
Watch the YouTube video below to see two fraction lessons demonstrated step by step.


Learn More 
If you want to learn more about how to teach using LEGO bricks, check the Brick Math program website. The books in the series are available as both printed books and as PDFs, and can be purchased on the website, on Amazon and Kindle, and on TpT. Brick sets that have been designed for the program are available from that site as well. You can also purchase individual LEGO bricks from LEGO Pick a Brick, or from online resellers of LEGO bricks such as www.bricklink.com or www.brickowl.com.

Dr. Shirley Disseler is an associate professor at High Point University and chair of the Department of Elementary and Middle Grades Education, and the STEM coordinator for the BA to MEd program. She is a LEGO® Education Academy Trainer and has been instrumental in developing and testing several LEGO® Education products. Disseler serves on the LEGO® Education Ambassadors Panel and is the trainer for the High Point University Teacher Academy for LEGO® Education. She has over 25 years of educational experience from elementary school teaching through higher education, including gifted education and exceptional children. She has recently started a new business called BrickEd on the Move that offers camps, field trips, and events based on learning with LEGO bricks.