Showing posts with label geometry. Show all posts

July 21, 2017

Teaching Tricky Trapezoids: Inclusive vs. Exclusive Definitions


Why Your Students Might Not Be
Classifying Trapezoids Correctly 


Do you teach quadrilateral classification? If so, did you know there are THREE ways to define a trapezoid?

Americans use either the inclusive or the exclusive definition depending on their curriculum. To complicate matters even more, teachers who live outside the United States define trapezoids in a completely different way! Believe it or not, the British English definition is the exact opposite of the two American definitions!

Which definition are you supposed to be teaching? If you're not sure, it's entirely possible that you're teaching the wrong definition! But don't feel bad if you discover this to be true because you are not alone. In fact, until recently, I didn't even know which definition was used by the Common Core State Standards!

Before we dig into this topic, you need to know which definition you're currently teaching. To find out, answer the trapezoid question below before you read the rest of this post. Then read the information under the 3 polygons that explains what your answer means.

What Your Answer Reveals

Because there are three ways to define a trapezoid, there are three correct answers to the question. Your response will reveal the definition you use to classify trapezoids.
  • If you only chose polygon 3, you use the exclusive definition which states that a trapezoid has EXACTLY one pair of parallel sides. This is the definition that I learned, and it's the one I thought the Common Core used (but I was wrong).  
  • If you chose polygons 1 AND 3, you use the inclusive definition which states a trapezoid has AT LEAST one pair of parallel sides. Many educators favor this definition because the other quadrilateral definitions are inclusive. For example, a parallelogram is a 4-sided figure with both pairs of opposite sides parallel, which means that squares and rectangles are also parallelograms. 
  • If you only chose polygon 2, you're using the British English classification system which states that a trapezoid is a quadrilateral with NO parallel sides. You teach your students that a quadrilateral with one pair of parallel sides is a trapezium, not a trapezoid


Which definition SHOULD you be teaching?

Now you know which definition you use to classify trapezoids, but is that the definition you're supposed to be teaching? If you aren't 100% sure, make a note to check on it. Until recently, I thought the Common Core used the exclusive definition, but I discovered that the CCSS actually uses the inclusive definition! I posted a question on my Facebook page to find out which trapezoid definition most teachers were using, and over 180 people responded. I was surprised to learn that most teachers who follow the CCSS teach the inclusive definition.

How to Teach Kids to Classify Tricky Trapezoids

If this is the first you've heard that there are three ways to define a trapezoid, you might be wondering how much to share with  your students. I mean, quadrilateral classification is challenging enough to teach without having to explain that there are three different correct ways to define a trapezoid!

I recommend that you find out which trapezoid definition you are expected to teach, and only teach that ONE definition. You could tell your students that they might learn a slightly different definition at some point in the future, but if you go into too much detail, your students will end up more confused than ever.

After you know which definition you're supposed to be teaching, how do you introduce it to your students and help them learn to classify trapezoids correctly?

I've found that the best way to help your kids teaching those tricky trapezoids is with a simple sorting activity. There are two versions of this activity, and it's best to use both of them if possible. The first is a printable, hands-on activity for math partners which is great for guided practice. The other is a Google Slides activity you can assign in Google Classroom for additional practice or assessment. Both activities are included in the Sorting Tricky Trapezoids (or Trapeziums) freebie below. The directions in this post explain how to conduct the teacher-guided partner activity; directions for using the Google Slides version are included in the freebie.


Trapezoid (or Trapezium) Sorting Directions for Partners:
  1. Begin the activity by introducing the characteristics of a trapezoid (or trapezium) according to the definition you are expected to teach. 
  2. Next, pair each student with a partner and give each pair one copy of the Quadrilaterals to Sort printable. Ask them to work together to cut out the polygons and stack them in a pile. 
  3. Explain that they will take turns sorting the quadrilaterals into one of two categories using the T-chart. Give each pair a copy of the T-chart or have one person in each pair draw the T-chart on a dry erase board. 
  4. Before guiding them through the sorting activity, assign the roles of Partner A and Partner B in each pair. Then ask Partner A to select the first quadrilateral and place it in the correct column on the T-chart. Partner A then explains the quadrilateral's placement to Partner B who gives a thumbs up if he or she agrees. If Partner B does not agree, the two students should discuss the proper placement of the quadrilateral and move it to the other column if needed. 
  5. Partner B then chooses one of the remaining quadrilaterals, places it on the chart, and explains its placement to Partner A. Partner A must approve the placement, or the two students discuss the definition and placement before continuing. 
  6. Students continue to switch roles throughout the activity. If they aren't able to agree on the placement of one of the quadrilaterals, they should set it aside for the time being. 
  7. As students are working, walk around and observe them to see if they are classifying the trapezoids correctly. Stop to help students who are confused or who can't agree on the placement of one or more quadrilaterals. 

Hands-on Activities for Classifying Quadrilaterals

This simple sorting activity is actually one of the most effective ways to teach kids to classify any type of quadrilateral. In fact, it's so effective that I developed a complete lesson for classifying quadrilaterals based on this strategy. Classify It! Exploring Quadrilaterals includes several introductory activities as well as a challenging game and two assessments.
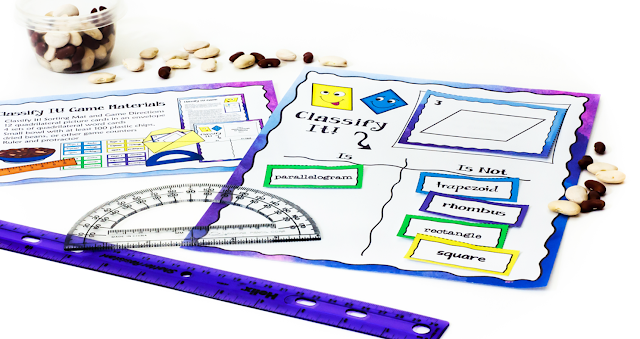

One reason I wanted to bring the tricky trapezoid situation to your attention is that I've recently updated Classify It! Exploring Quadrilaterals to include all three definitions. There are now THREE versions of the lesson materials within the product file.

No matter which definition you're supposed to be teaching, Classify It! Exploring Quadrilaterals has you covered. You'll find lessons, printables, task cards, answer keys, and assessments that are aligned with the quadrilateral classification system used by your curriculum. Not only are these activities engaging and fun for kids, the lessons will help them nail those quadrilateral classifications every time! If you don't believe me, head over to see this product on TpT where you can read feedback from 400 teachers who have used Classify It! Exploring Quadrilaterals with their students.


By the way if you already own Classify It, you can download the updated version for free by clicking over to the Classify It! Exploring Quadrilaterals page on TpT. If you're logged in, you'll see a link at the top that says "Download Now! You own it!"

If you teach quadrilaterals and haven't purchased it yet, take a few minutes to preview it on TpT. If you use it with your students, I think you'll agree that Classify It is the most effective and FUN way to foster a deep understanding of quadrilateral classification!


October 30, 2012

Spontaneity Brings Math to Life!

By Nyla Phillips-Martin, Guest Blogger

Last week, while in the midst of teaching a lesson on cuboids, I quickly realised that I had to do something drastic to get the attention of my most easily distracted student. I mean, there I was feeling all proud of myself for having everything I needed, I had my examples and non-examples for the students to handle, observe and compare attributes. My classroom was buzzing with excitement; hands were fervently flying up during Q & A time as I selected students to answer questions.

But the hand that I was looking for at the front corner of the class never went up. Justin (let’s call him Justin) just sat there looking away from me, tapping his ruler on the desk. Then he poked another student with his pencil. Now, it is not uncommon for him to be like this because he sometimes gets into trouble in order to avoid class work. What I needed to do was to get his attention without halting the momentum that the other students were having. At that moment, an idea popped into my head.

I walked out of the room, spun around and returned with a silly grin and a cuboid net in my hand. I didn't say a word. I just slowly folded the net into a talking cuboid (like a puppet). Think of a box with the top lid open – that flap became the puppet’s mouth. Anyway, I used the silliest voice I could muster and made the puppet talk.

He introduced himself as Corey the Cuboid and went on to talk about his other siblings and the fact that he feels like the odd one out because he cannot roll like the cylinder or sphere and he’s not as cute as his brother the cube. My fourth grade students were wide eyed and everybody was paying attention – not to me the teacher, but to the cuboid on show.

They all wanted to have their turn with handling Corey the Cuboid and making him talk (including Justin). In fact, they had so much fun making him talk that I videotaped one of my students as she brought Corey to life!


I really enjoyed that cuboid net lesson and it taught me that even with a lot of planning, a touch of spontaneity keeps things interesting. The lesson gave me an idea for their math project – to have them put on their own puppet show featuring different talking 3D Shapes.

If you like the idea of having students create puppets from 3D shapes, feel free to use the patterns from this free assortment of 3D shape nets that I created to save yourself some time! And don’t forget to flip out and be just a tad spontaneous!


Nyla Phillips-Martin, is a young wife, mother, and teacher in the Caribbean. She has a B. Ed Degree in Primary Education and is in her seventh year of teaching. She hopes to show other teachers in her country the power of using technology for use in records, planning and especially in the classroom. To her, education is all about fostering creativity and facilitating hands-on learning. Visit Nyla's blog, Nyla's Crafty Teaching, for more engaging lesson ideas!

March 23, 2012

Island Conquer Area & Perimeter Games

Area and perimeter are two concepts that students frequently confuse, so fun math games to practice those skills are always welcome - especially when they are free! Island Conquer is a set of two games that provide opportunities for students to explore area or perimeter on a coordinate grid. Students play with a partner and take turns using the Coordinate Cards to plot rectangles on the Island Conquer game board. After each person plots a rectangle, he or she calculates the area or perimeter of the "captured" island. At the end of the game, they add up the total area or perimeter to find out who is the new Island King or Queen!

You can download this freebie from the Geometry folder in my online Math File Cabinet at Teaching Resources. I hope your students enjoy this game as much as mine did!


March 22, 2012

Hands On Geometry - Part II

Guest Blog Post by Stephanie Moorman of Teaching in Room 6

Last week I shared Hands-on Geometry, Part I, and I'm back with Part II! The Hands-on Geometry Freebie shown on the right includes templates that go with both lessons.

Area and Perimeter
I love going outside for these standards.  Heading out with our rulers and paper in hand, the kids measure various signs and playground objects.  I usually have the students find both the area and the perimeter of the objects (depending upon what time of year I have them do this activity). This is really fun, since the kids often have to work together to measure the objects (since the lines on the playground are often larger than the 12 inches a ruler provides)  They are getting practice in converting inches to feet, measuring large objects, AND finding the perimeter and/or area of those objects.  So much math, all on the playground!

Surface Area
I like to have the students discover this concept for themselves.  I give them a tissue box, paper, and scissors, with instructions to cover the box with no overlap.  Then they have to tell me how much paper they need.  This takes some time, but they actually all do figure out that they need to create a net, measure each side, find the area of each side, and add it all together.

Volume
Back to the food again!  Using the marshmallows (they are cheap and easy because of their shape), the students need to create cubes and rectangular prisms of set sizes.  If I have them create a 36 marshmallow cube, they can see that the entire thing gets filled it.  It is 36 cubic units.  We then count the marshmallows on the length, the width, and the height.  Multiply them together, and you get 36 cubic units!

Circumference
The circumference of a circle is about 3 times the diameter.  To show the students this, I take them outside to one of the painted circles on the playground.  We all sit around it and I have the students walk the diameter of the circle.   When we all have a basic idea of what the diameter is, the kids then walk the actual circle.  To their amazement, it really does take them 3x as long to walk around the outside of the circle!

There really are so many different ways to help the students learn the different concepts found within the Geometry and Measurement strands.  With a little creativity, it is easy to make these vital standards come to life for the students!  How have you made these standards more hands-on?  Please comment below.  I would love to hear about it!

Stephanie Moorman is a 5th grade teacher who has been teaching elementary school for 14 years. She has her Masters in Education and is Nationally Board Certified. She is the creator of the Teaching in Room 6 blog where she enjoys sharing her strategies with others. 


March 12, 2012

Hands-on Geometry - Part I


Guest Blog post by Stephanie Moorman of Teaching in Room 6

Measurement and geometry standards span all grade levels. Because of this repeated exposure, you would think that the students would grasp the concepts easily.  However, that just isn’t so. Identifying various polygons and solid shapes, breaking them down into their basic lines and angles, discovering the perimeter and area of a shape is sometimes tricky for the students.  Especially when most of the time the work the students are doing is from a text book.

In an effort to help my students more clearly grasp the Measurement and Geometry standards, I have tried hard to break away from the book and use hands-on strategies to introduce and reinforce concepts.  Here are a few of the activities and lessons I have done in the past to teach my students measurement and geometry. Next week in Part II of this blog post, I'll share a few more.

Polygons
Identifying various two-dimensional shapes can be rather boring when simply looking in a book.  One thing I have done to get my students more actively involved in their learning is to break out my trusty stack of magazines.

The students divide their paper into 5 columns, one for each of the basic polygons we are learning.  If you are learning more (ie: equilateral triangle, scalene, isosceles  or the various different types of quadrilaterals) just divide your paper into the appropriate amount of columns.  At the top of the page, I have the students draw the regular polygon and we list the attributes.  Then, they are off.  The students search the magazine for pictures of the polygons, cut them out, and glue them under the proper column heading.

Solid Figures
Once the students enter into the realm of three-dimensional solid figures, using the book definitely doesn’t cut it.  So there are several things I do to get the kids thinking, and learning, about solid figures.

I always introduce the figures with pictures.  We look at plain, generic solids, and I ask the students to tell me objects they have seen that would match those shapes.  Kids always mention things like ice cream cones for the cone shape, soda can for a cylinder, dice for a cube, a pyramid for a square pyramid, and a book for a rectangular prism.  I then have them go home that night and search for actual objects that would fit into the categories.  They write down all the objects they can, and bring one of their choice in.  The next day, we all categorize the found objects.You can download this chart by clicking on the image; the chart is page 2 of the freebie which includes a worksheet for next week's activity, too.

Food is always a hit with the students.  Actually creating solid figures out of marshmallows and toothpicks is a wonderful way to get the kids thinking.  We discuss the vertices, edges, and faces for each solid figure, and the students set about building them.

Nets of Solids
Using the marshmallow figures described above, I have the students deconstruct them and create the nets.  This is VERY difficult for them, mostly because once you take some of the toothpicks out of the marshmallows, there are edges missing!  The students need to figure out that they have to add the toothpicks and marshmallows to create the whole.  It is interesting to see who gets this concept.

Another thing I have done with nets is to give the students a piece of paper and let them create the nets.  Kids must figure out that the circles on a cylinder must be the same diameter as the length of the rectangle.  They need to use all of the same size squares for a cube.  Everything needs to be very precise or it just won’t work!

Angles and Lines
I am big on kinesthetic learning. Because of this, I have a lot of motions and gestures instilled in my teaching of concepts to help the kids better understand.  When it comes to angles, we get moving a lot!  Using their arms, I have the students show me each type of angle and line as best they can.  The kids really get into it!  When I say “parallel lines”, their arms always move up over their heads in two straight lines.  When I say “ray”, their arm extends out and they point off in one direction.  An “obtuse angle” has two arms, one extended out straight from their body and the other at a large angle.  The kids LOVE moving around, and it really helps them remember all of the different angles and lines.

So there you have it!  These are some simple ways to get your kids actively involved in learning the Measurement and Geometry standards.  There are SO many more ways to have a hands-on experience with these standards, and I'll be share a few more with you next week. I'll also be including a Hands-on Geometry freebie for you to customize!  If you have ideas to share, please leave a comment and let us all know!

Stephanie Moorman is a 5th grade teacher who has been teaching elementary school for 14 years. She has her Masters in Education and is Nationally Board Certified. She is the creator of the Teaching in Room 6 blog where she enjoys sharing her strategies with others.